Homeowner Guide · Sinkholes & Slab Settlement
The Complete Florida Homeowner's Guide to Sinkholes, Sunken Concrete & Slab Leveling
What's actually happening under a Florida slab that sinks, cracks or drops at one corner — the geology behind it, the warning signs worth acting on, and how a same-day polyurethane lift compares to tearing everything out.
By the Florida Polyurea Coatings & Concrete Lifting team · Published July 28, 2026 · 15 min read
The geology, plain and simple
What’s Actually Happening Underground: Florida’s Karst Geology
Most of Florida sits on top of a very old, very thick bed of limestone and dolomite — soft, porous rock formed millions of years ago from compressed marine sediment. In a lot of the state that rock is surprisingly close to the surface, sometimes just a handful of feet under the sand, clay and topsoil we actually build on. This kind of landscape, where soluble bedrock sits under a thin soil cover, has a name: karst terrain, and it’s the single biggest reason Florida behaves so differently underground than most of the rest of the country.
Limestone and dolomite aren’t inert. Rainwater picks up carbon dioxide as it falls and moves through soil, which makes it mildly acidic — not dangerous to touch, but just acidic enough to slowly dissolve calcium carbonate rock over time. That slightly acidic groundwater works its way into the natural cracks, joints and pore spaces already present in the limestone, widening them year after year, decade after decade. Over a long enough timeline, small fractures become channels, channels become passages, and passages become open voids and cavities in the rock, sometimes well below where anyone would ever dig or drill.
How an underground void eventually shows up at the surface
A void opening up in bedrock forty or sixty feet down doesn’t announce itself immediately. The sand and clay soil sitting above the limestone can bridge a void for a surprisingly long time, arching over the open space almost like a shallow dome. But that soil bridge isn’t infinite — as groundwater keeps moving through it and individual sand grains keep raveling down into the opening below, the bridge slowly thins. Eventually it can no longer support the weight of the soil, and whatever is sitting on top of it, above.
Two different modes: gradual sinking versus sudden collapse
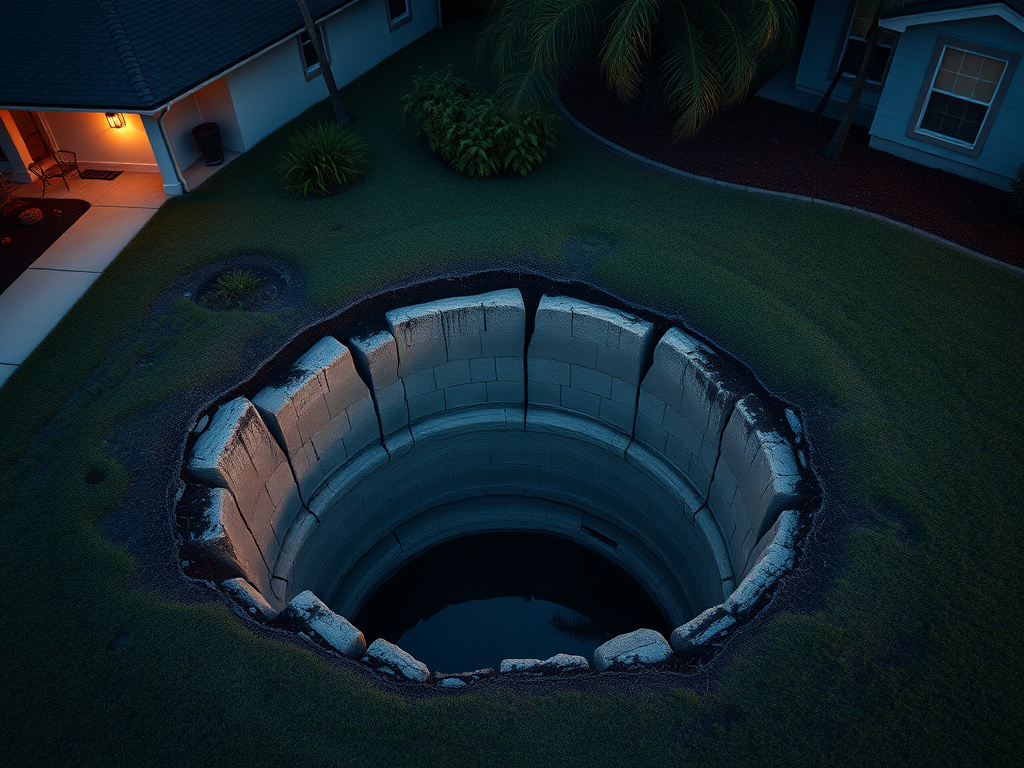
Geologists generally describe two patterns. Cover-collapse happens when that soil bridge fails all at once, producing a sudden, sometimes dramatic depression or hole — rare, but the version everyone pictures when they hear the word “sinkhole.” Far more common, especially in a residential setting, is cover-subsidence: a slow, gradual settling as sand continues raveling into a void over months or years, showing up as a slab that drops unevenly, a yard that develops a shallow low spot, or cracks that widen a little more every season. The overwhelming majority of the settlement we’re called out to look at in Florida is this slower, subsidence pattern — not a sudden collapse.
Where the risk concentrates
Sinkhole Alley: The Florida Counties With the Highest Risk
Sinkhole activity isn’t spread evenly across the state. There’s a well-documented corridor running through the west-central part of the peninsula — Pasco, Hernando, Hillsborough, Polk, Marion and Alachua counties — where the limestone sits unusually close to the surface and groundwater movement is especially active. This band has earned the nickname “Sinkhole Alley” for a reason: Pasco County specifically carries the highest per-capita sinkhole rate anywhere in the United States, a result of thin, sandy soil sitting directly over shallow, easily dissolved limestone, combined with heavy seasonal swings in the water table that speed up the whole process.
If you’re a homeowner in that corridor, it doesn’t mean a sinkhole is inevitable under your specific lot — most properties in these counties never experience anything beyond ordinary soil settlement. It does mean the underlying geology is the kind that produces this activity more often than almost anywhere else in the country, which is exactly why a diagnostic eye that understands karst terrain matters more here than in a lot of other places.
Why South Florida’s risk profile looks completely different
Drop south into Miami-Dade, Broward or Palm Beach County and the underlying geology changes substantially. The limestone down there is younger, softer and sits under a much deeper layer of sand, shell and organic soil, and the water table runs much higher and more consistently year-round. True karst dissolution voids are far less common in that environment. Instead, the settlement issues we see in South Florida trace mostly to a different mechanism entirely: soft, compressible soils, fill material that keeps consolidating for years after a home is built, and a permanently high water table that never lets the soil beneath a slab fully firm up. The surface symptoms — a sunken slab corner, a cracked driveway panel — can look nearly identical to what shows up in Sinkhole Alley, even though the mechanism underground is a completely different problem.
What to look for
7 Warning Signs Your Slab or Yard Is Telling You Something
Settlement rarely announces itself with one dramatic event. It usually shows up as a handful of small, easy-to-dismiss changes around the property that, taken together, point to soil movement underneath. Here are the seven we see most often, in roughly the order homeowners tend to notice them.
1. Cracks running diagonally from door and window corners
A single hairline crack in concrete or drywall is often just ordinary curing shrinkage and not worth losing sleep over. A crack that runs at a diagonal from the corner of a door or window frame, especially one that’s widening over a period of weeks or months, is a different signal — it usually means the structure above it is twisting slightly as the ground underneath settles unevenly.
2. Doors and windows that stick, bind, or won’t latch
When a slab or foundation shifts even a small amount, door and window frames rack out of square. A door that used to close easily and now drags on the frame, or a window that won’t slide or latch the way it used to, is often the first thing a homeowner physically feels rather than sees.
3. A widening gap between the slab and the foundation wall
Walk the perimeter of a patio, driveway or garage slab and look at where it meets the foundation wall or the house itself. A visible, growing gap there — sometimes wide enough to fit a finger or a coin — usually means the slab has dropped relative to the structure it used to sit flush against.
4. New depressions or low spots in the yard
A shallow bowl-shaped low spot that wasn’t there a year ago, especially one that collects standing water after a normal afternoon rain, is one of the more reliable outdoor signs of soil settling into a void or loosened area below. It doesn’t need to be dramatic to be meaningful — even a subtle dip worth noticing on a mower pass is worth a second look.
5. Fence lines, posts or mailbox footings leaning or shifting
Fence posts and mailbox footings are set shallow and are sensitive to even modest soil movement. A section of fence that has started leaning, a post that’s visibly tilted relative to its neighbors, or a run of fence that no longer sits level along the ground can indicate the same subsurface movement showing up nearby.
6. A slab or floor that’s no longer level
Set a level, or even just a marble or golf ball, on a driveway, garage floor or patio and watch what it does. A slab that visibly slopes toward one corner, or a ball that consistently rolls to the same spot, means that section has dropped relative to the rest of the pour — often before the difference is obvious just by eye.
7. Interior cracks at ceiling corners or along drywall seams
Settlement outside doesn’t always stay outside. Cracking at the corners of ceilings, along drywall seams, or where an interior wall meets the ceiling can reflect the same structural racking that’s showing up as exterior slab movement, especially when it appears on the same side of the house as a sinking driveway or patio.
Any one of these on its own can have an innocent explanation. Two or three showing up together, especially on the same side of the property, is the pattern worth getting a professional set of eyes on.
Telling one cause from another
How a Professional Inspection Tells Sinkhole Activity From Ordinary Settlement
Cracks and a sunken corner look similar no matter what’s causing them, which is exactly why guessing from the surface is unreliable. A real inspection starts with documentation: photographing every crack, gap and depression, and noting where each one sits relative to the slab and the structure around it.
From there, a technician measures actual elevation differences across the slab using a level or optical instrument rather than eyeballing it — the difference between a slab that’s dropped a uniform half-inch across its whole footprint and one that’s dropped three inches at a single corner tells two very different stories. Probe rods or a soil auger can check for loose, void-filled or unusually soft ground directly beneath the affected area, which helps distinguish an active void from soil that has simply compacted evenly under normal load over time.
Grading and drainage around the affected area get checked too — a low spot that collects water is a very different problem from a dry, gradually settling corner, and the fix is often different as a result. When the evidence points to something beyond what a concrete and soil inspection can responsibly diagnose — a large, active void, or movement that suggests deeper structural involvement — the honest next step is a referral to a licensed structural engineer or geotechnical firm for deeper subsurface testing before any repair work proceeds. We’d rather send you to the right specialist than guess.
The repair method
Polyurethane Concrete Lifting, Step by Step
Once a slab has been diagnosed as structurally sound but sitting on soil that has settled, eroded or lost support, polyurethane injection is the most direct way to put it back where it belongs — without breaking the slab out.
Step 1 — Small entry holes
A pattern of holes roughly the size of a dime is drilled through the slab at the locations where support is needed. That’s a fraction of the size mudjacking requires, and it’s easy to patch flush once the work is done.
Step 2 — Expanding foam injection
A two-part polyurethane material is pumped through each hole under controlled pressure. Once it contacts the soil, it begins expanding almost immediately, flowing into voids, loose pockets and gaps that are actually causing the lack of support.
Step 3 — The slab rises within minutes
As the foam expands, it exerts gentle, even lifting pressure from below. The technician monitors elevation continuously during this stage, working the injection points in sequence so the slab rises evenly rather than tilting or overcorrecting in one spot.
Step 4 — Same-day return to use
The material reaches enough strength to support the slab in about fifteen minutes. Entry holes are patched, the area is cleaned, and the driveway, garage floor or patio is back in normal use the same day — no waiting days for a slurry to firm up.
Why the material matters here
Why Polyurethane Beats Mudjacking Specifically on Florida Soil
Mudjacking — pumping a heavy cement, sand and soil slurry underneath a slab through large holes — was the standard slab-lifting method for decades, and it can still work. But the material itself works against you on Florida’s sandy, moisture-saturated soils. A cubic foot of that slurry can weigh well over a hundred pounds, which adds significant dead load directly on top of soil that may already be struggling to carry the slab above it. And because the mixture stays workable and somewhat soft for a period after it’s pumped in, a high water table can wash out fines from the mix before it ever fully sets.
Polyurethane sidesteps both problems. It's roughly a tenth of the weight of mudjacking slurry, so it doesn’t add a meaningful new load to already-soft ground. It's a closed-cell material, which means it doesn’t absorb groundwater the way a cement-and-soil mix can, making it far better suited to a state where the water table sits close to the surface across most of the peninsula. On typical Florida market ranges, mudjacking tends to run about $3 to $8 per square foot, while polyurethane runs roughly $5 to $25 per square foot depending on the depth of fill needed — the higher end of that range buying less weight, faster cure, smaller holes and real moisture tolerance.
- ✓Cures rigid enough to support the slab in about 15 minutes, versus a slurry that stays workable for a longer stretch
- ✓Weighs a fraction of cement-based slurry, so it doesn't add meaningful new load to already-soft soil
- ✓Closed-cell chemistry resists water intrusion, which matters directly on Florida's high water table
- ✓Dime-sized entry holes instead of the 1–2 inch holes mudjacking requires
- ✓Precise, targeted fill of the actual void rather than a broad slurry pour
- ✓Same-day return to full use rather than a multi-day wait for the slurry to firm up
An honest limit
When Lifting Isn’t Enough: Structural Fill and Engineering Referrals
Polyurethane injection is an excellent tool for a specific problem: a structurally sound slab sitting on soil that has lost support underneath it. It is not the right tool for every problem that looks similar on the surface, and a contractor who tells you otherwise isn’t doing you any favors.
If a slab has cracked into separate pieces that no longer move together as one unit, injecting foam underneath it can lift the pieces unevenly rather than solving anything — replacement is the more honest path in that case. If probing and inspection point to a void that’s unusually large, deep, or still actively developing, filling it with injection foam alone may not address what's happening well below the reach of a slab-lifting crew. In those situations, the right call is a referral to a licensed structural engineer or geotechnical firm, who can evaluate whether deeper structural fill, underpinning, or another engineered solution is needed before any surface repair makes sense.
We tell homeowners this upfront rather than after the fact: a same-day lift is the right answer for the majority of settlement we see, but not for all of it, and knowing which situation you’re actually in is the entire point of a real inspection.
What it typically runs
Real Cost Ranges: Three Worked Examples
These are illustrative typical examples drawn from common Florida residential scopes, not firm quotes — every slab, void volume and access situation is different, and the only way to get an accurate number is an on-site look.
Small, single-panel jobs can start around $500. A full whole-project scope on a typical residential slab most often lands between $1,700 and $4,000. Large commercial slabs with significant void volume or difficult access can run into $20,000 or more.
| Driveway apron (settled corner, ~150–300 sq ft affected) | Roughly $1,700–$2,600 as a typical illustrative range for a single-slab lift |
|---|---|
| Pool deck (multi-panel, one or two sunken sections) | Roughly $2,200–$4,000 as a typical illustrative range, depending on panel count and access |
| Garage slab (interior slab-on-grade with a corner or edge drop) | Roughly $1,800–$3,200 as a typical illustrative range for a standard two-car footprint |
Illustrative typical ranges only. Your actual number depends on square footage, drop distance, void volume beneath the slab, and site access — confirmed after an on-site inspection.
From first call to finished repair
The Inspection-to-Repair Timeline
Most residential jobs move through these five stages in a matter of days, not weeks — the inspection and diagnosis are usually the longest part of the process.
Call & Symptom Review
You describe what you're seeing — cracks, a sunken corner, a sticking door — and we ask enough questions to know what kind of visit to schedule.
On-Site Inspection
A technician walks the slab and the yard around it, measures elevation differences, checks nearby grading and drainage, and documents everything with photos.
Diagnosis & Written Plan
We explain what the evidence points to, what it doesn't, and lay out a scoped plan in writing — including whether a structural referral is the honest next step.
Injection & Lift
On lift day, small entry holes go in, foam is injected in measured lifts, and the slab is monitored the entire time it's rising.
Same-Day Wrap-Up
Holes are patched, the site is cleaned, and the slab is back in normal use before we leave — with a note on what to watch for afterward.
Reducing the odds
Prevention: Grading, Drainage and Gutters
You can’t change the limestone under your lot, but you can control how much water sits against a slab or works into the soil beneath it — and that’s the single biggest lever a homeowner actually has.
- ✓Grade soil so it slopes away from the foundation and slab edges rather than toward them
- ✓Extend gutter downspouts well past the foundation instead of letting them dump at the base of a wall
- ✓Fix low spots in the yard promptly rather than letting them collect standing water after every rain
- ✓Keep irrigation heads from spraying directly against slab edges or foundation walls
- ✓Watch for erosion channels forming along a driveway or walkway edge and address them early
- ✓Have persistent damp areas near the foundation checked rather than assuming they'll dry out on their own
Living with the repair
Aftercare and Monitoring
A properly diagnosed and executed lift should hold for years without further work. That said, a little ongoing attention goes a long way toward catching anything early if the ground around the repair ever moves again.
Take dated photos of the repaired area right after the work is finished, including a level or straightedge laid across the slab — that baseline makes it easy to spot even small changes later. Recheck the same spot after Florida's rainy season each year, since heavy, sustained rainfall is when soil movement is most likely to show up again if it's going to. Keep the drainage and grading improvements from the prevention step in place, since a repair sitting in the same wet conditions that caused the original problem is working against itself. If a new crack, gap or dip appears anywhere near the repaired area, get it looked at while it's still small — it's far easier to address early settlement than to wait until it's advanced.
Before you hire anyone
A 10-Question Checklist for Hiring a Concrete-Lifting Contractor
Ten questions, asked before any work starts, separate a contractor who diagnoses the actual problem from one who's just there to inject foam and move on.
- ✓Do they inspect and measure the slab on-site before giving you a number, rather than quoting from a phone description?
- ✓Can they explain, in plain terms, what they think is causing the settlement — and what would change their diagnosis?
- ✓Do they check soil and void conditions beneath the slab, not just the surface cracking?
- ✓Will they tell you honestly if lifting isn't the right fix, or if a structural referral makes more sense?
- ✓Do they provide a written, itemized scope rather than a single lump-sum number?
- ✓What material are they injecting, and can they explain why they use it over alternatives?
- ✓How is drainage and grading around the area handled as part of the plan, if at all?
- ✓What's their process for monitoring the slab's elevation during the lift itself?
- ✓Do they offer a written warranty on workmanship, and what specifically does it cover?
- ✓Can they point to other jobs in your area with a similar soil or geology profile?
Common questions
What Florida Homeowners Ask Us Most
Have a slab-specific question that isn't answered here? Send us photos and we'll give you a straight read on what we're seeing.
How do I know if my slab is sinking because of a sinkhole or just normal settlement?
+
The pattern is the biggest tell. Ordinary settlement tends to be gradual, broad and roughly even across a slab, often tied to fill soil compacting under a driveway or patio. Sinkhole-related movement is usually localized — a distinct corner, panel or area drops relative to the rest of the slab, sometimes with a visible depression forming in the adjacent yard. A professional inspection measures the actual elevation differences and looks at what's happening in the surrounding grade before ruling anything in or out — guessing from a crack pattern alone isn't reliable.
How long does polyurethane concrete lifting take?
+
Most residential jobs — a driveway section, a garage slab, a run of pool deck panels — are a same-day visit. The foam itself expands and reaches enough strength to support the slab within about 15 minutes of injection, so the lift happens in stages over a few hours rather than overnight. You're typically back to normal use of the area the same day the crew leaves.
Can a sunken slab always be lifted back to level, or does it sometimes need to be replaced?
+
Lifting works extremely well for slabs that are structurally intact but sitting on soil that has settled, eroded or lost support underneath — which describes the large majority of residential settlement. It is not the right tool for a slab that has cracked into pieces that no longer act as one unit, or for a void so large or active that injection can't fill it responsibly. In those cases the honest answer is full replacement or a referral to a structural engineer, and we'll tell you that directly rather than injecting foam into a problem it can't solve.
Is polyurethane injection foam as strong as the original concrete?
+
The foam isn't a concrete substitute — it's a lightweight, high-density structural fill that expands to close voids and re-support the slab from below. Once cured, it carries residential and light commercial loads without compressing or breaking down, and because it's closed-cell, it doesn't absorb water the way loose soil or an aggregate slurry can. The concrete slab itself stays as the load-bearing surface; the foam's job is giving it solid, uniform support underneath again.
What's the real difference between mudjacking and polyurethane concrete lifting?
+
Both aim to raise a sunken slab, but the material and method are very different. Mudjacking pumps a heavy cement-and-soil slurry through large holes, which adds significant dead weight on top of soil that may already be struggling to support the slab, and the slurry can stay soft enough to wash out under a high water table. Polyurethane goes in through dime-sized holes, weighs a fraction of the slurry, expands to fill voids precisely, and cures water-resistant within minutes — which is why it's become the preferred method on Florida's sandy, moisture-heavy soils.
How much does concrete lifting cost in Florida?
+
Small, single-panel jobs can start around $500, a typical whole-project range for a driveway section, garage slab or run of pool deck panels lands around $1,700 to $4,000, and larger commercial slabs with significant void volume can run into $20,000 or more. The real number depends on square footage, how much the slab has dropped, how much void space is underneath it, and site access — which is why a scoped, itemized number after an on-site inspection is worth far more than a phone estimate.
If you've spotted one or more of the warning signs above, start with our polyurethane concrete lifting and slab leveling page for the full service breakdown, or read more on sinkhole and settlement concrete repair specifically. If you're weighing whether to lift or replace, our concrete lifting vs. slab replacement comparison walks through how that decision actually gets made. When you're ready for an on-site look, start your quote here.
Get a free inspection on your slab
Send us what you're seeing — cracks, a sunken corner, a low spot in the yard — and we'll come look, measure, and give you a straight, itemized plan.